Building a Wedding Photobooth
I got married back in August, and we wanted a couple of activities for people to do and to take something away with them.
For the last few Buffer Retreats, I've created various Photobooths and GIF Booths and thought it'd be neat to have something similar but taken to the next level.
We could've easily rented a photo booth but there's not much fun in that...
I've had a CNC machine for a couple of years, creating small items that are sold on Michelle's store, The Woof Warehouse. I had seen an Instructable post for a Plywood Photobooth that was made a couple of years ago and that formed the inspiration for ours.
Planning
My CNC machine is an Inventables X-Carve, usually, I use their browser-based software Easel to design and plan out projects before using it to kick off the carves.
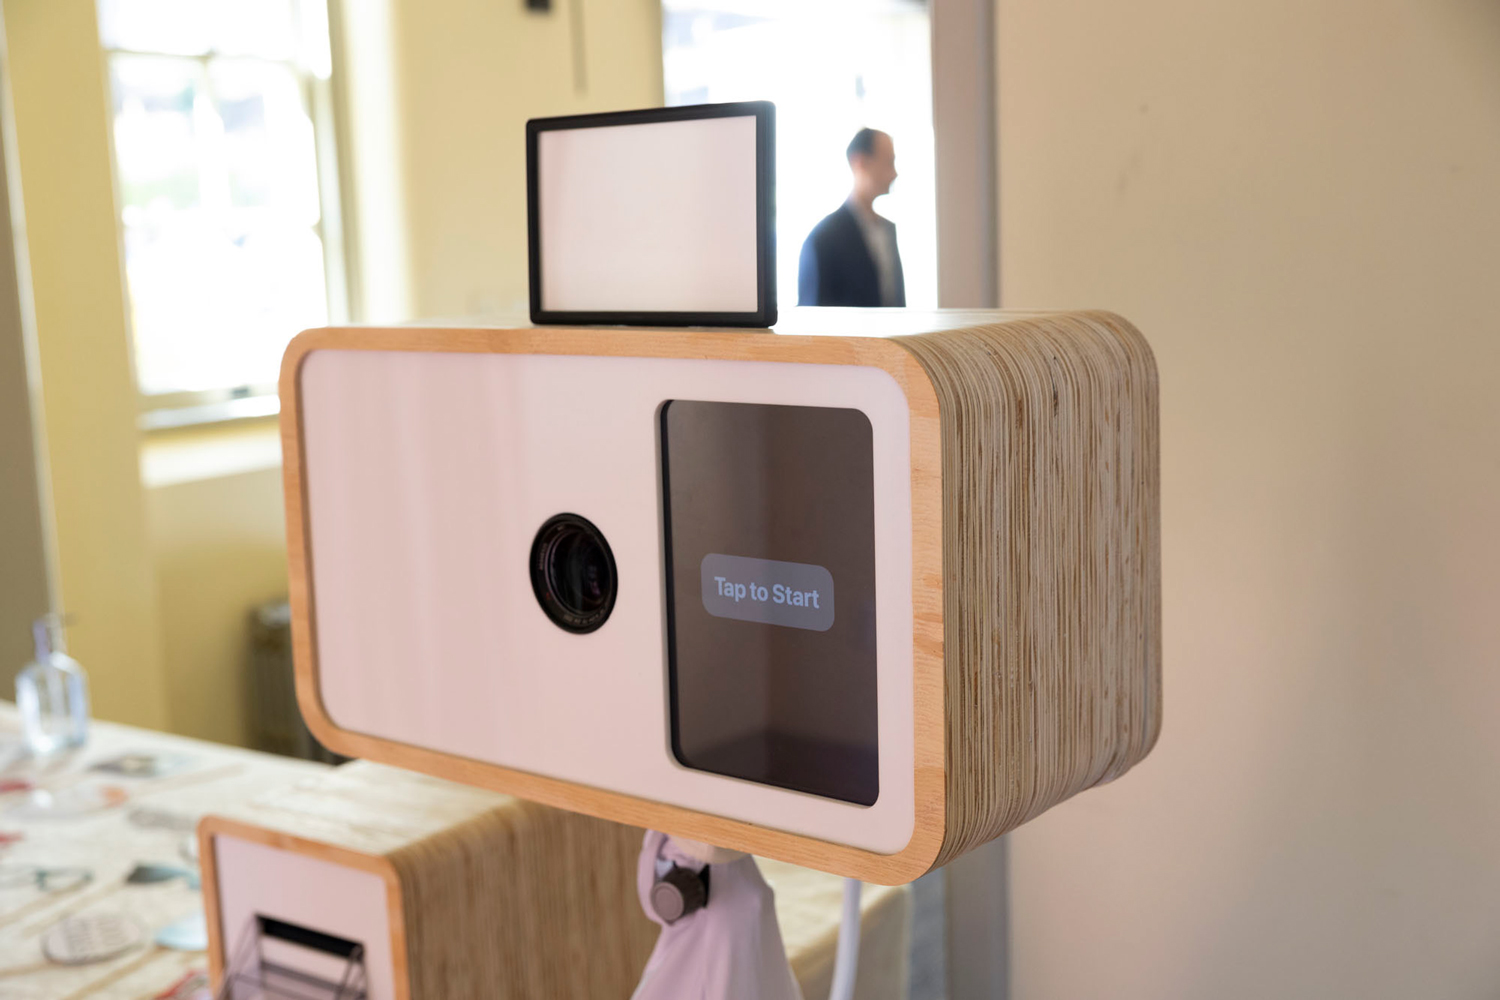
This time around, instead of using Easel, I planned out the Photo booth box using Fusion 360. The main task was determining the dimensions needed to fit the hardware that I'd be using to allow guests to start taking photos and show them a countdown and preview.
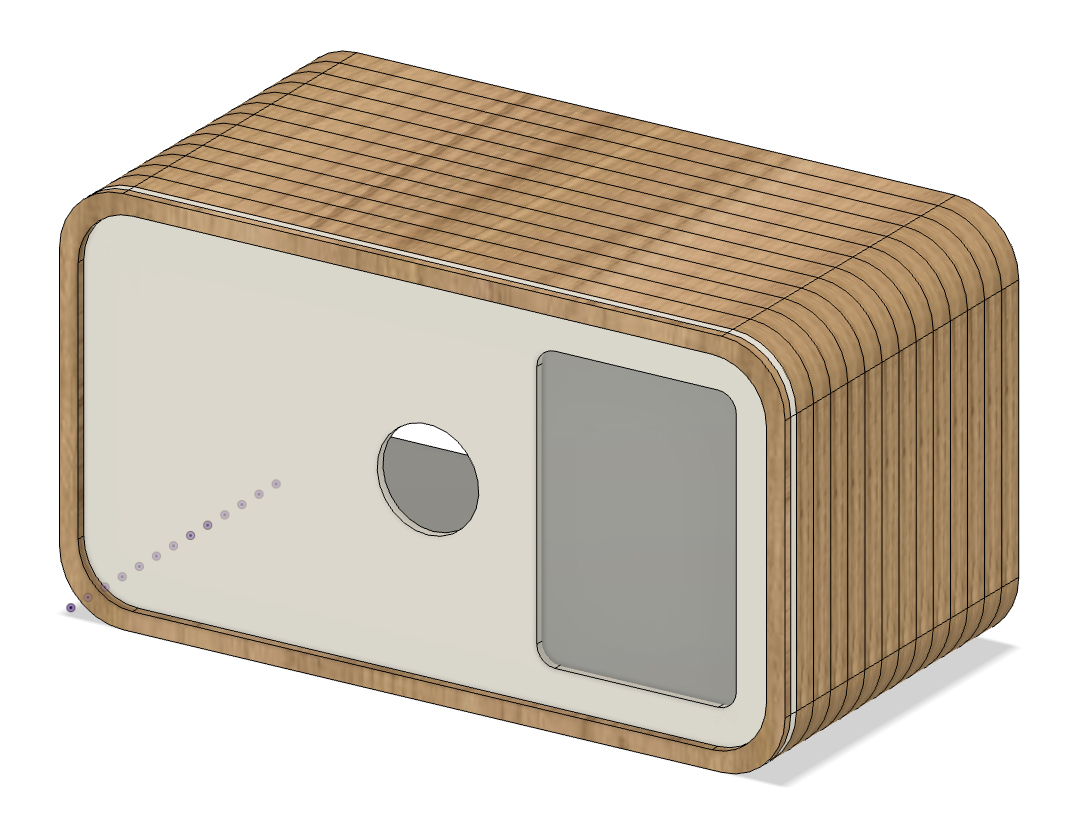
I loved the look of the layered plywood from the instructable, so opted to do the same with the front made of acrylic. In the Fusion 360 design you can see the acrylic layer but in the final product, the acrylic was embedded within a layer.
Along with the main photobooth, there would be a sidekick Dye-sublimation printer which would print off photo strips for guests to take away. Unfortunately, Dye-sub printers don't look super appealing, so I planned a small enclosure for the printer using the same method.
CNC'ing
Carving the elements was done over a few months. Making use of my four day work week to carve elements on Friday's with the main chunk of work done in the last couple of months before the wedding.
There were a couple elements I didn't plan out entirely. For instance I didn't have a plan for attaching the rear of either enclosure and ended up solving those as I completed the boxes. I wanted something that would be easy to remove in case we needed to swap out the printer media or adjust a camera setting. Ultimately, I used magnets to hold a plywood rear to both the photo booth and printer boxes. In the end both included vents for airflow in case I found the hardware would overheat during my testing.
Like with any project, the CNC'ing didn't always go to plan. I ended up carving too close to edges a couple of times, which meant scrapping that piece and moving on to the next.
Fortunately, the boxes I had planned allowed me to use the leftover wood from the photo booth box as layers for the printer box. Then the leftover wood from that was used to create canvas sign stands.
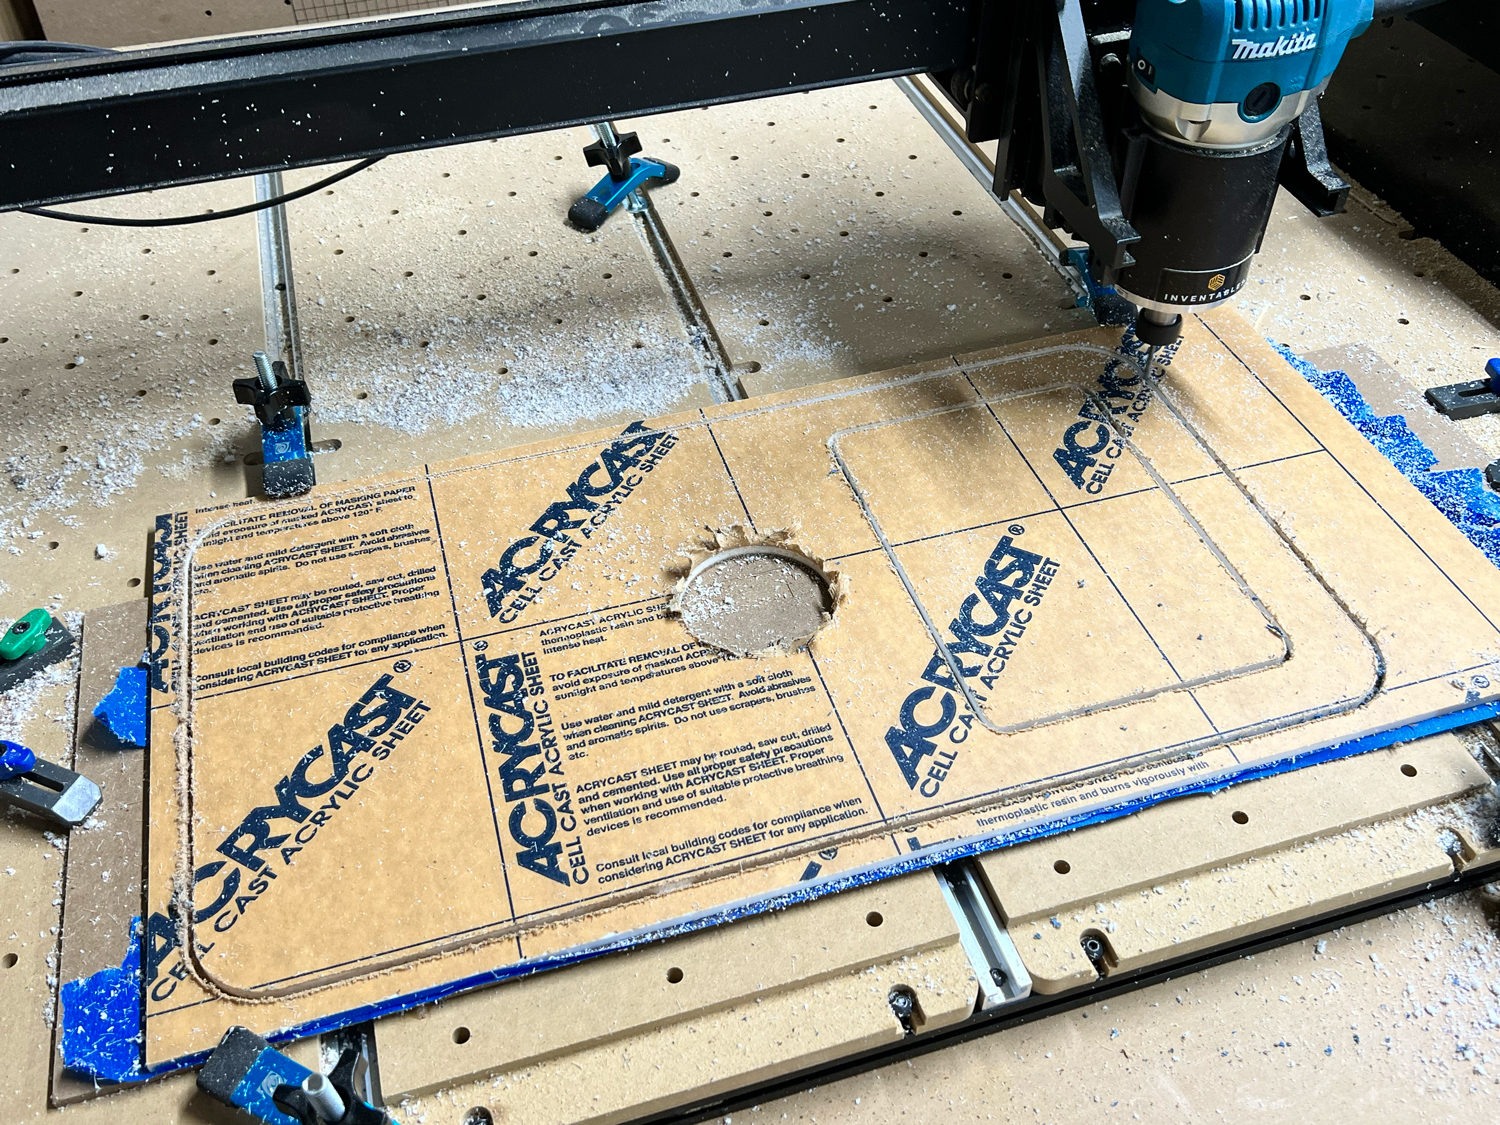
I also carved two acrylic fronts, one for the photo booth and one for the printer. The photo booth front has an iPad cut out for the lens, and the printer front has a slot that needed to be spot on for the prints to fly out.
Assembling the enclosures
I started assembling the layers of the photo booth enclosure by simply using wood glue. Originally I planned to have dowels that would slide through each piece to align and add additional support but ended up giving up on that once I felt how strong the glued pieces were.
I turned my attention to the printer box and tackled that. The box is much smaller and I could iron out any issues while building that box before moving my attention back to the photo booth enclosure.
I managed to save a couple of pieces I had thrown to one side as failures. Either by trimming them down to the same shape as the final layers or by cutting out a section that was too thin and sneakily gluing a new piece in from another failed layer. I then made sure those were on the bottom and out of sight.
For the front of both enclosures, I inserted the acrylic into the front plywood sections and glued those in place. Both acrylic fronts move slightly with force applied but remain in place if touched.

I then covered them the acrylic in blue tape to avoid any scratches while sanding. There were quite a few hours of sanding. Smoothing the rough plywood edges down to a smooth finish, although it could be smoother, I was happy with the result. Our garage is still covered in a small layer of sawdust.
The Tech
I planned to use a Sony A7rii with the image and UI displayed on an iPad. Unfortunately, it isn't possible (not easily anyway) to display the camera input on an iPad within an app.
In the end, I used a Mac Mini with a capture card to get the Sony A7rii output in to the Mac Mini. I then needed to get the Mac Mini displayed on the iPad and make sure touches would register as clicks. To do that, I used Luna Display, setting it up so it was the primary display for the Mac Mini. I disabled the Mac Mini's authentication requirement so it'd go into macOS and start the Luna Display app.
I also included a small bluetooth keyboard in the enclosure, just in case we needed to adjust anything while at the wedding. Fortunately, it wasn't needed once it was all set up.
Here's a rundown of the tech...
- M1 Mac Mini
- iPad Pro
- Luna Display
- Sony A7rii
- Elgato HD60 S+
- Two Noctua 120mm Fans
- DNP QW410 Dye Sublimation Printer
- Viltrox Super Slim Light Panel
- iPazzPort Mini Bluetooth Keyboard with Touchpad.
- USB HUB
- Extension Cable
- Sony A7 Series Power Supply
The App
For the app, I ended up using SwiftUI and upgraded the Mac Mini to macOS Ventura (beta) so I could make use of the new ImageRenderer to generate the photo strips. Totally unnecessary and a little risky but it worked.
The app showed a button in its idle state, which would then kick off a sequence to take two photos each with there own countdown and a short gap in between for a quick pose change.
The app would take a snapshot of the camera output when it hit zero and use that in the photo strips. Meanwhile behind the scenes a command line script would get triggered to get the camera to take an actual photo which were downloaded to the Mac Mini and stored.
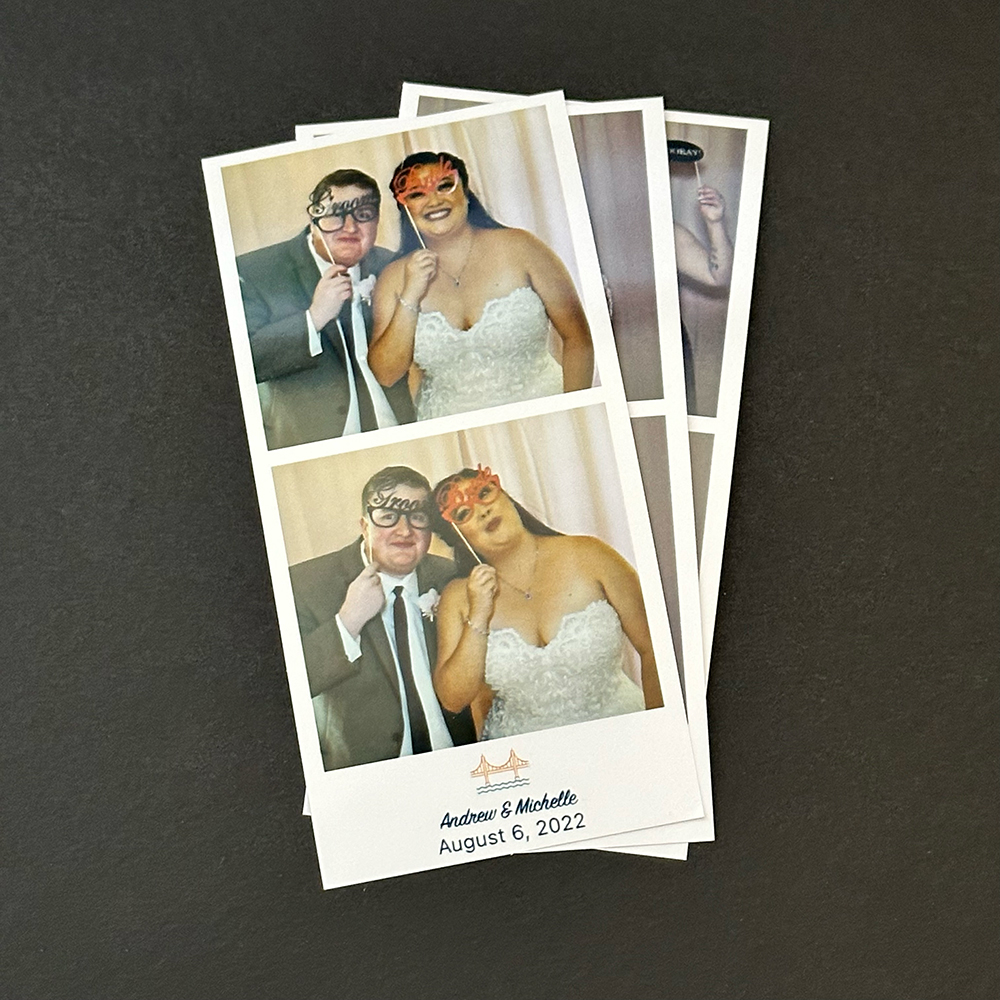
After each session, I'd have a file for the generated photo strip, the two photos in RAW format, and 3 printed photo strips.
Putting it together
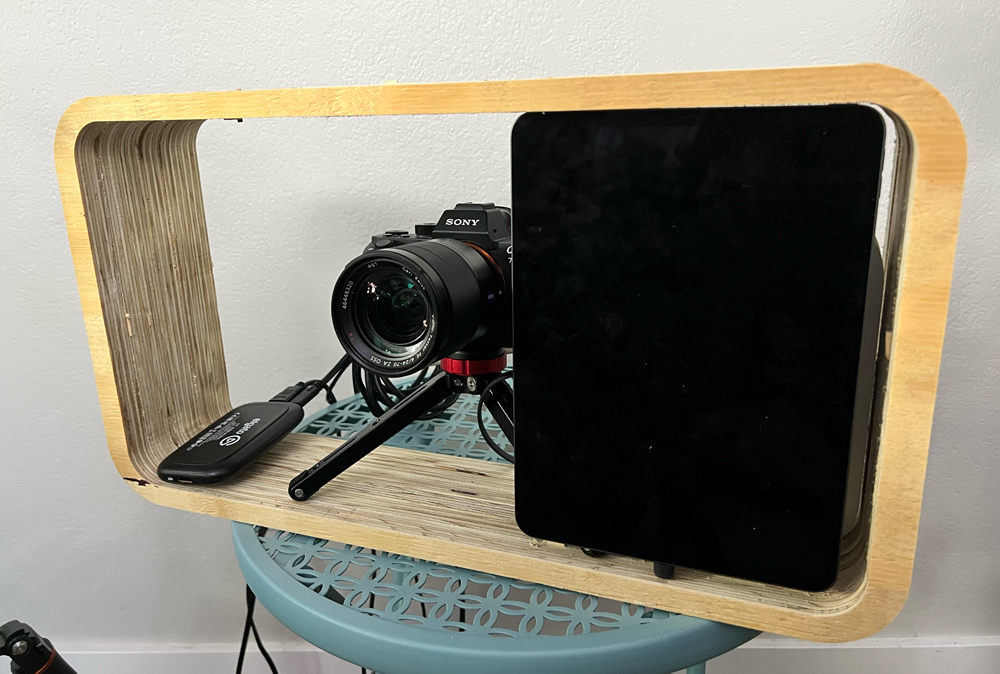
Putting everything together was relatively straight forward. In the end I purchased a screen protector for the iPad and up-cycled the easy fit tray as a way of mounting the iPad inside the box.
The camera was mounted to a small bendable tripod in order for it to use as little space as possible and sit low enough for the lens to poke through the front.
Once everything was in place and working smoothly, it was transported to the venue on the day of the wedding. It was a little risky but meant there was less for us to do.
I used my 3 Legged Things Tripod and mounted the quick release plate to the bottom. It wasn't the sturdiest thing in the world but it did the trick. We then covered the Tripod just to make it look a little more polished.
We paired the photo booth with a pair of C-stands and a backdrop from Amazon. A table was laid out with a bunch of props and the printer.
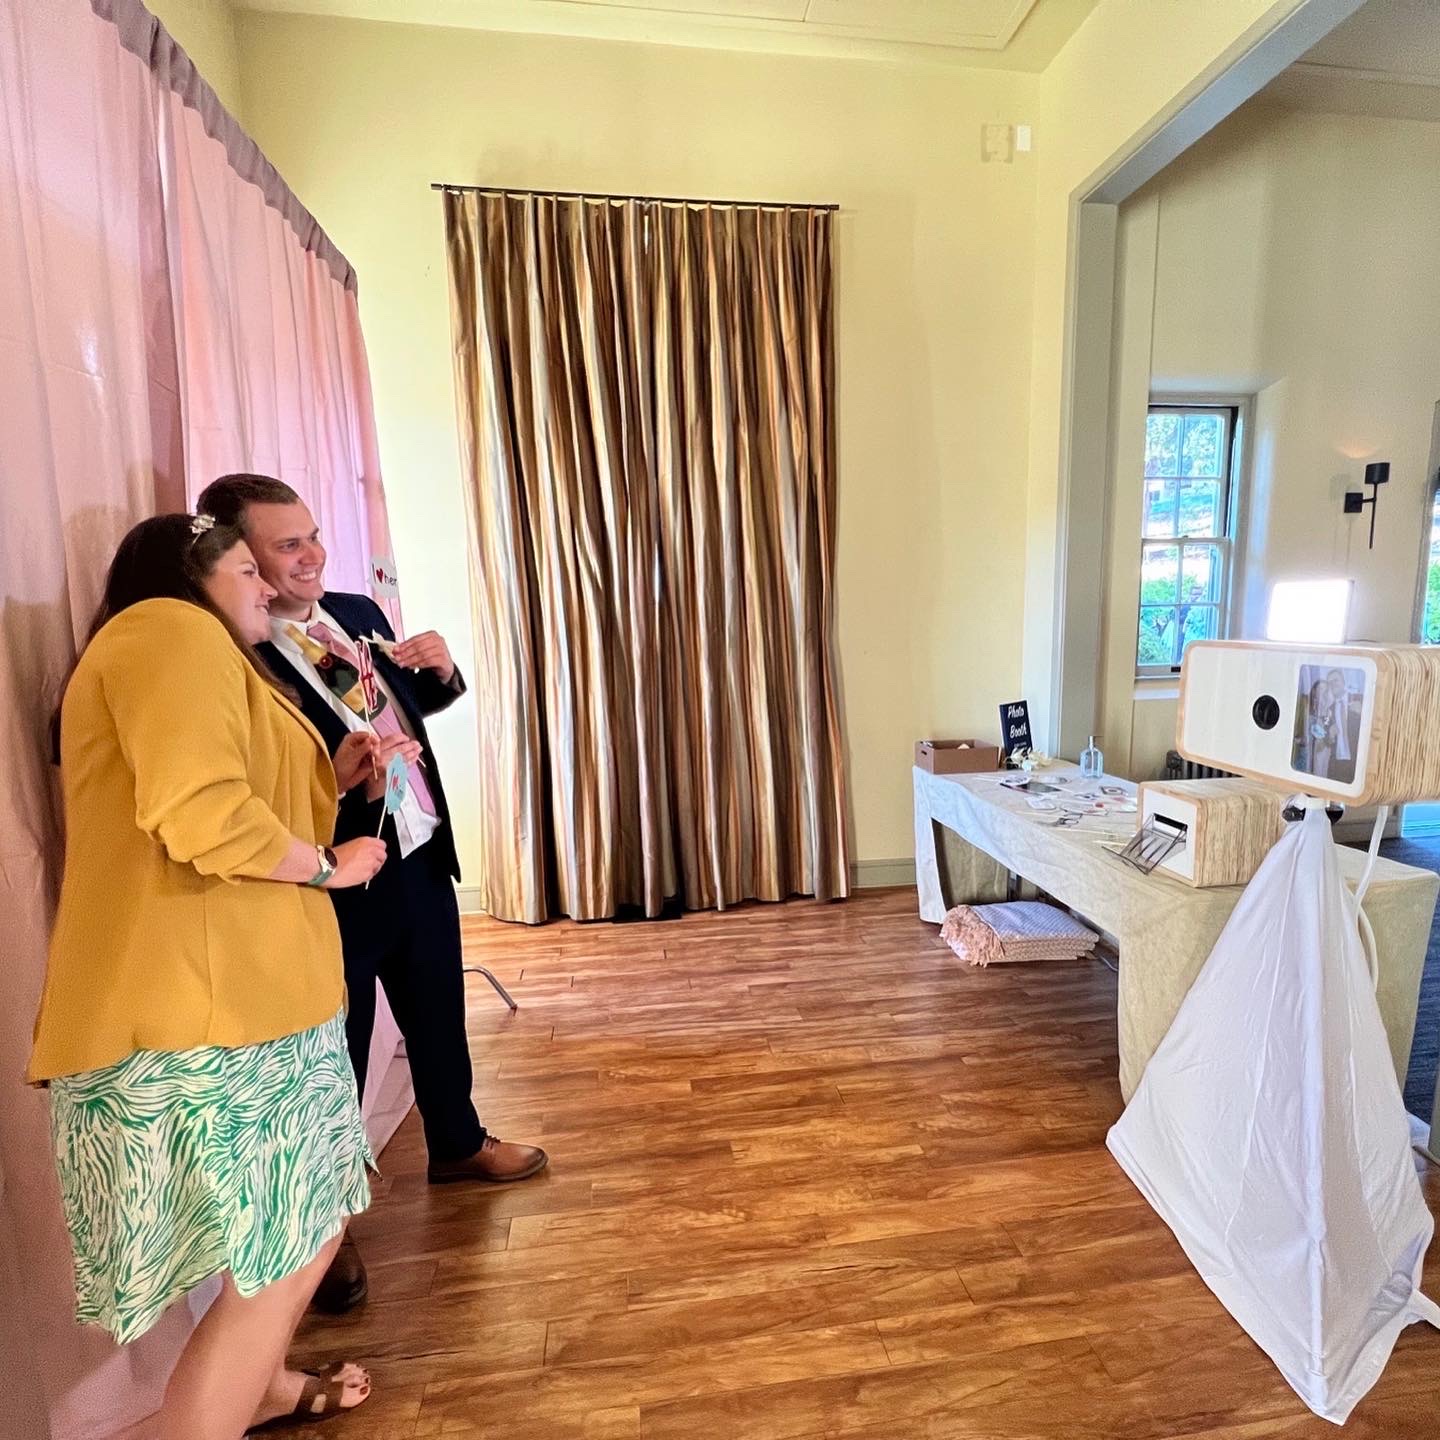
It was a hit, especially with the younger guests. I definitely saw a few guests with a stack of photo strips. Hopefully it can make its way to a Buffer retreat in some form. Might need some additional luggage allowance though.
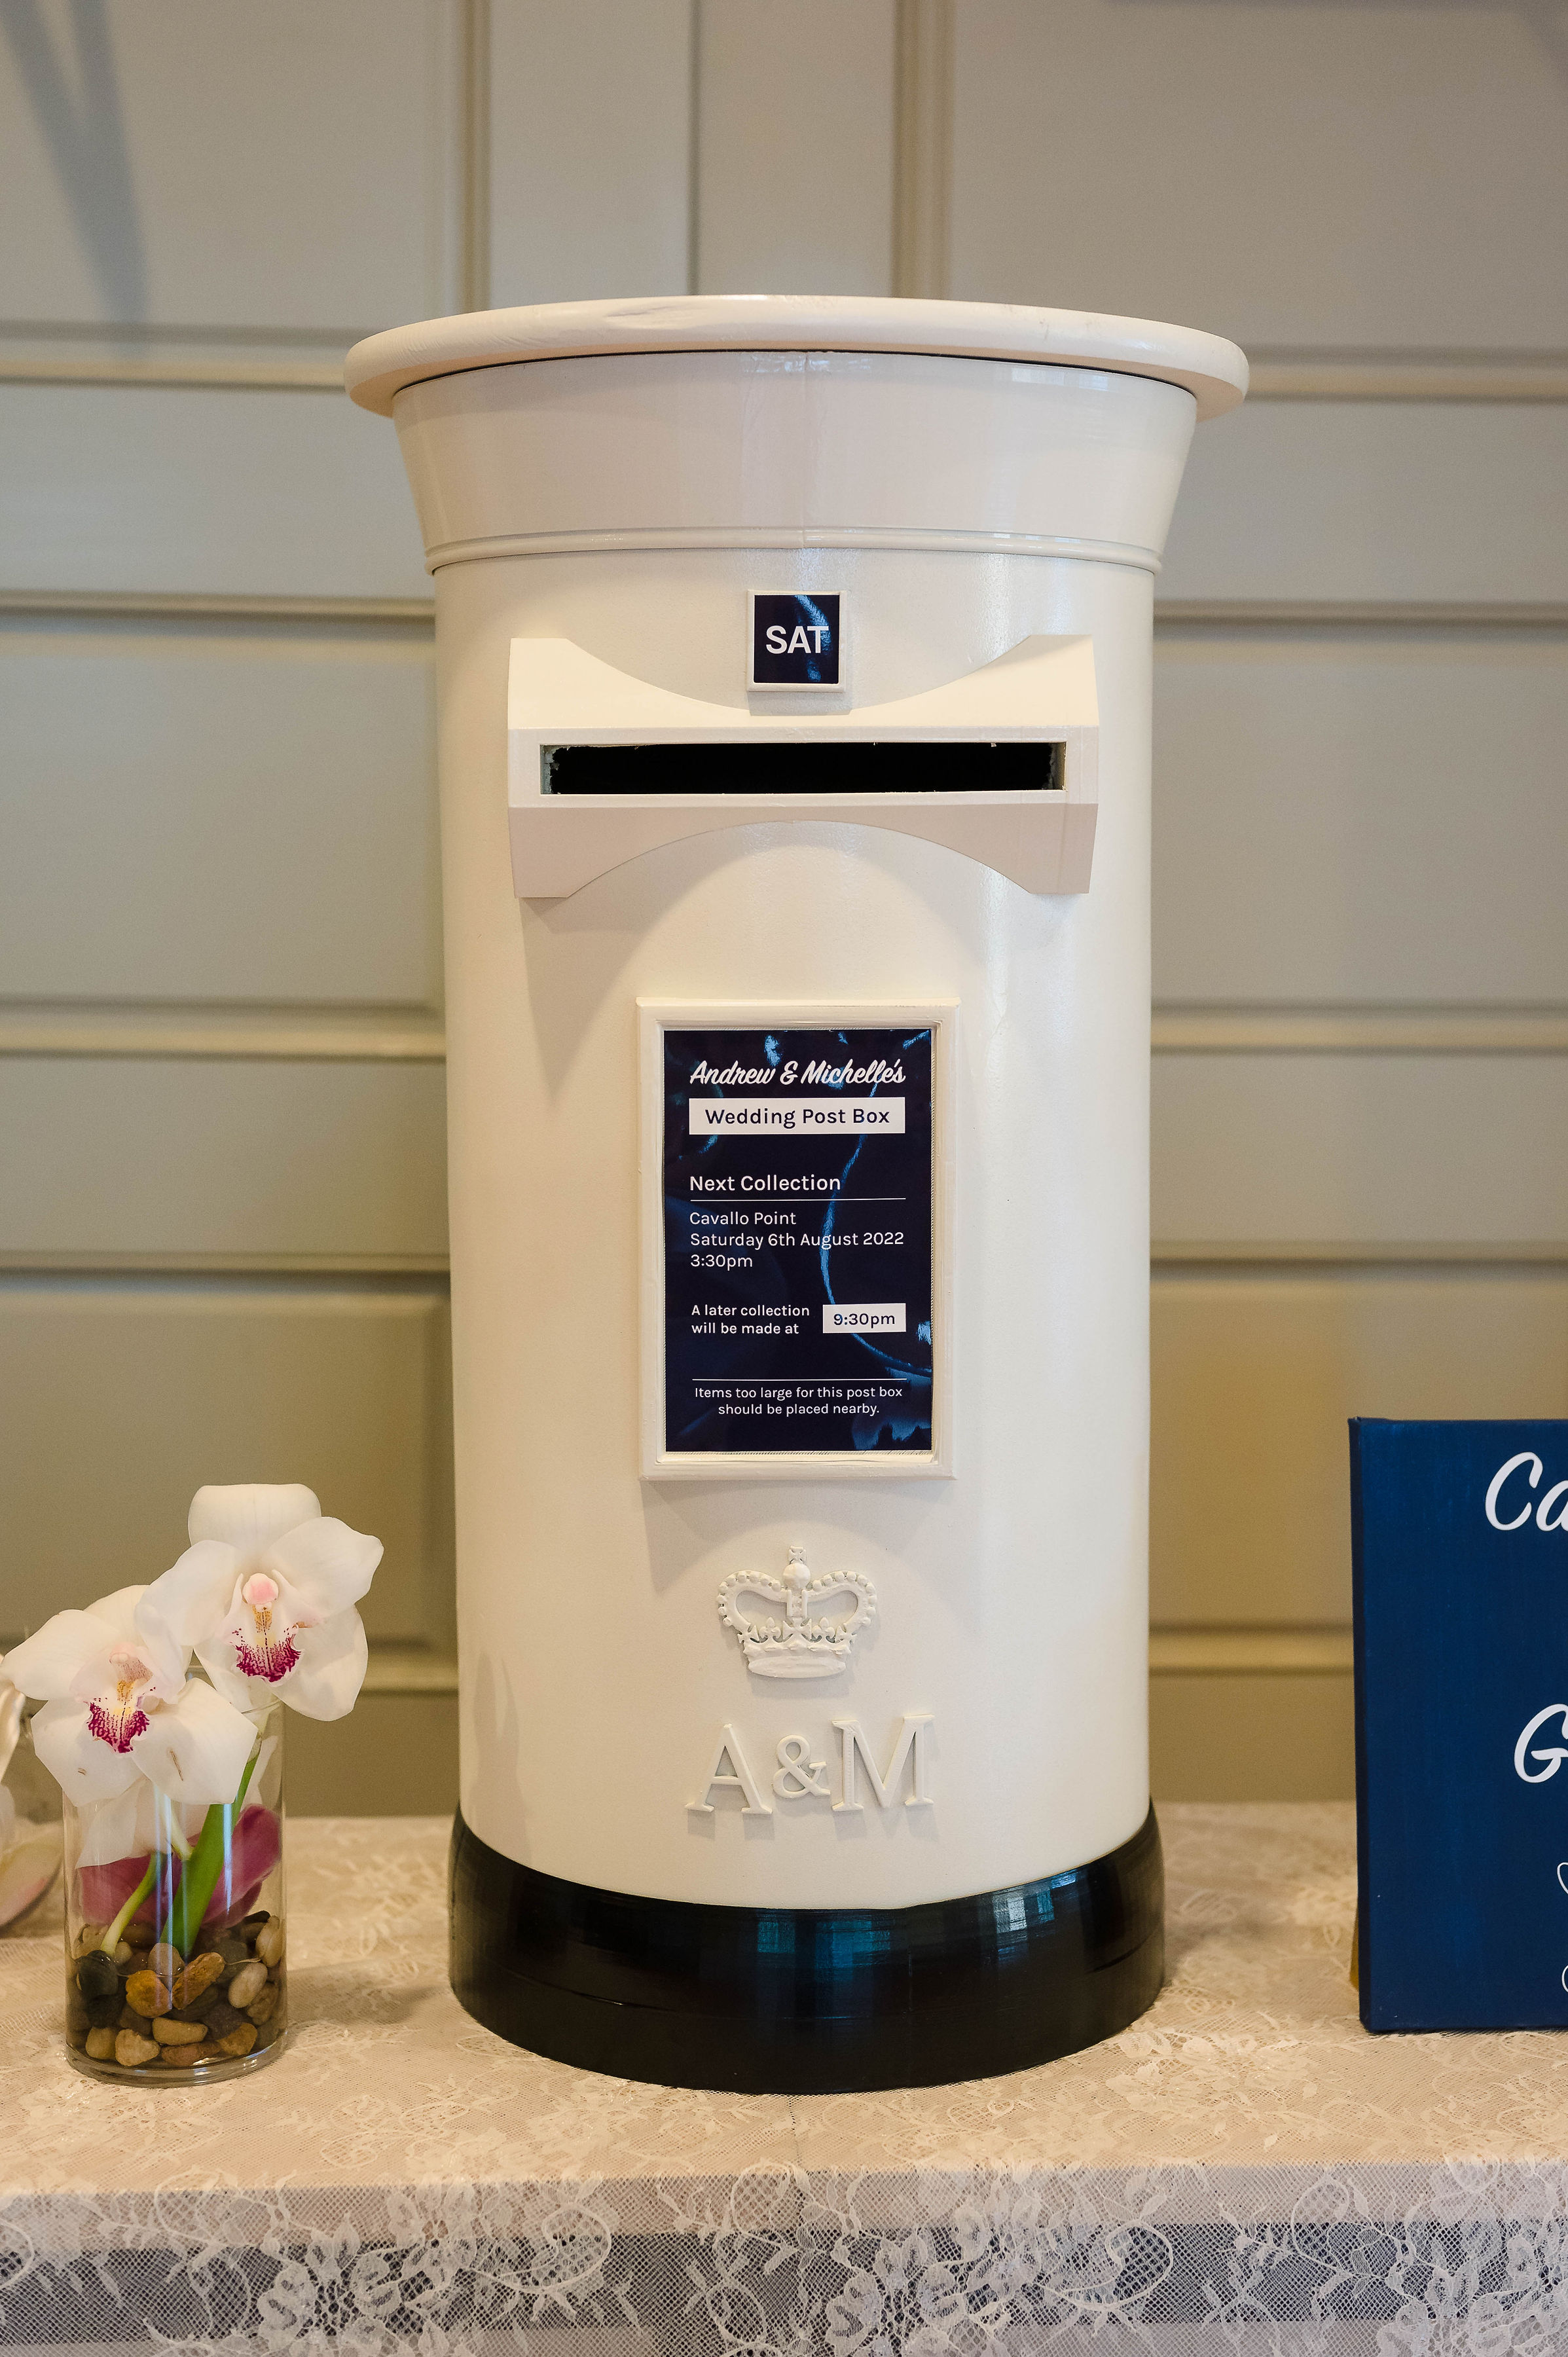
With everyone receiving three prints, a few ended up in our wedding mailbox alongside cards, advice & wishes. The postbox was another project I was tasked with. Me being British, we decided to style it off a British Post Box. It was built using a concrete form, foam, and a few 3D-printed parts and I think it came out pretty well.
Thanks to our wedding photographer, Danieka Erasmus for a few of the photos used in this post.